Sidehistorik
| Tip |
|---|
openHAB is an alternative to Home Assistant, and somewhat easier to configure. Where Home Assistant is Python/Yaml based, openHAB is Java. Both systems has great capabilities, and differs a lot in the approach, but I do prefer openHAB I You like UIs for config - this is a little "better" and the UI is better and the UI configuration great. |
Java install on Ubuntu
Do not install Java 10 or 11, currently only java 8 is supported (do review here)
| Kodeblok |
|---|
sudo apt install openjdk-8-jdk
java -version
openjdk version "1.8.0_191"
OpenJDK Runtime Environment (build 1.8.0_191-8u191-b12-0ubuntu0.18.04.1-b12)
OpenJDK 64-Bit Server VM (build 25.191-b12, mixed mode) |
| Advarsel |
|---|
With Java 10 accidently installed, I experienced that all things suddenly was "uninitiallized". |
Installing openHAB
...
configuration is nice. One of the parameters for choosing, can be the amount or specific support for devices, its seems to me that Home Assistant has quite a lot more that openHAB, but also that several of them lacks functionality and are difficult to actually configure/use; I never understood the "media_player" stuff in Home Assistant. Visit the Showcase and How-tos site. OpenHAB 2 supports the new Eclipse SmartHome APIs for bindings, and additional bindings can be found at GitHub For the HAPanel in OpenHAB, theres a wide varity of widgets I do use Home Assistant now a days - I has a more rapid release cycle and getting a lot of UI improvements... |
Topics
Indholdsfortegnelse
Screenshots
| Galleri | ||
|---|---|---|
|
Docker
https://www.openhab.org/docs/installation/docker.html
Very easy to start and configure.
| Kodeblok |
|---|
docker run \
        --name openhab \
        --net=host \
        -v /etc/localtime:/etc/localtime:ro \
        -v /etc/timezone:/etc/timezone:ro \
        -v /opt/openhab/conf:/openhab/conf \
        -v /opt/openhab/userdata:/openhab/userdata \
        -v /opt/openhab/addons:/openhab/addons \
        -d \
        -e USER_ID=1003 \
        -e GROUP_ID=9001 \
        --restart=always \
openhab/openhab |
Backup
The easiest way is the make a cron job for backup, information on backup and restore are at https://www.openhab.org/docs/installation/linux.html#backup-and-restore
| Tip |
|---|
Also, do review the latter openHAB Backup |
| Kodeblok |
|---|
sudo apt-get install zip sudo vi /etc/crontab 0 22 * * * /usr/share/openhab2/runtimeopt/openhab/bin/backup |
If You run the backup job manually one time, the location of the backup file(s) are shown:
| Kodeblok |
|---|
root@homeassist:/usropt/shareopenhab/openhab2/runtime/bin# ./backup ######################################### openHAB 2.x.x backup script ######################################### Using '/etc/openhab2' as conf folder... Using '/var/lib/openhab2' as userdata folder... Using '/usr/share/openhab2/runtime' as runtime folder... Using '/var/lib/openhab2/backups' as backup folder... Writing to '/var/lib/openhab2/backups/openhab2-backup-18_12_22-11_44_32.zip'... Making Temporary Directory if it is not already there Using /tmp/openhab2/backup as TempDir Copying configuration to temporary folder... Removing unnecessary files... Backup Directory is inside userdata, not including in this backup! Zipping folder... Removing temporary files... Success! Backup made in /var/lib/openhab2/backups/openhab2-backup-18_12_22-11_44_32.zip root@homeassist:/usr/share/openhab2/runtime/bin# |
| Advarsel |
|---|
A test - moving from one server to a new showed me that the backup is not "complete", as 2 things went wrong:
|
Security
Notice that OpenHab OpenHAB has no security, and You need to install it in front of openHabopenHAB. Do read Securing Communication and access to openHAB
Link for setting username password: Ngix and Apache
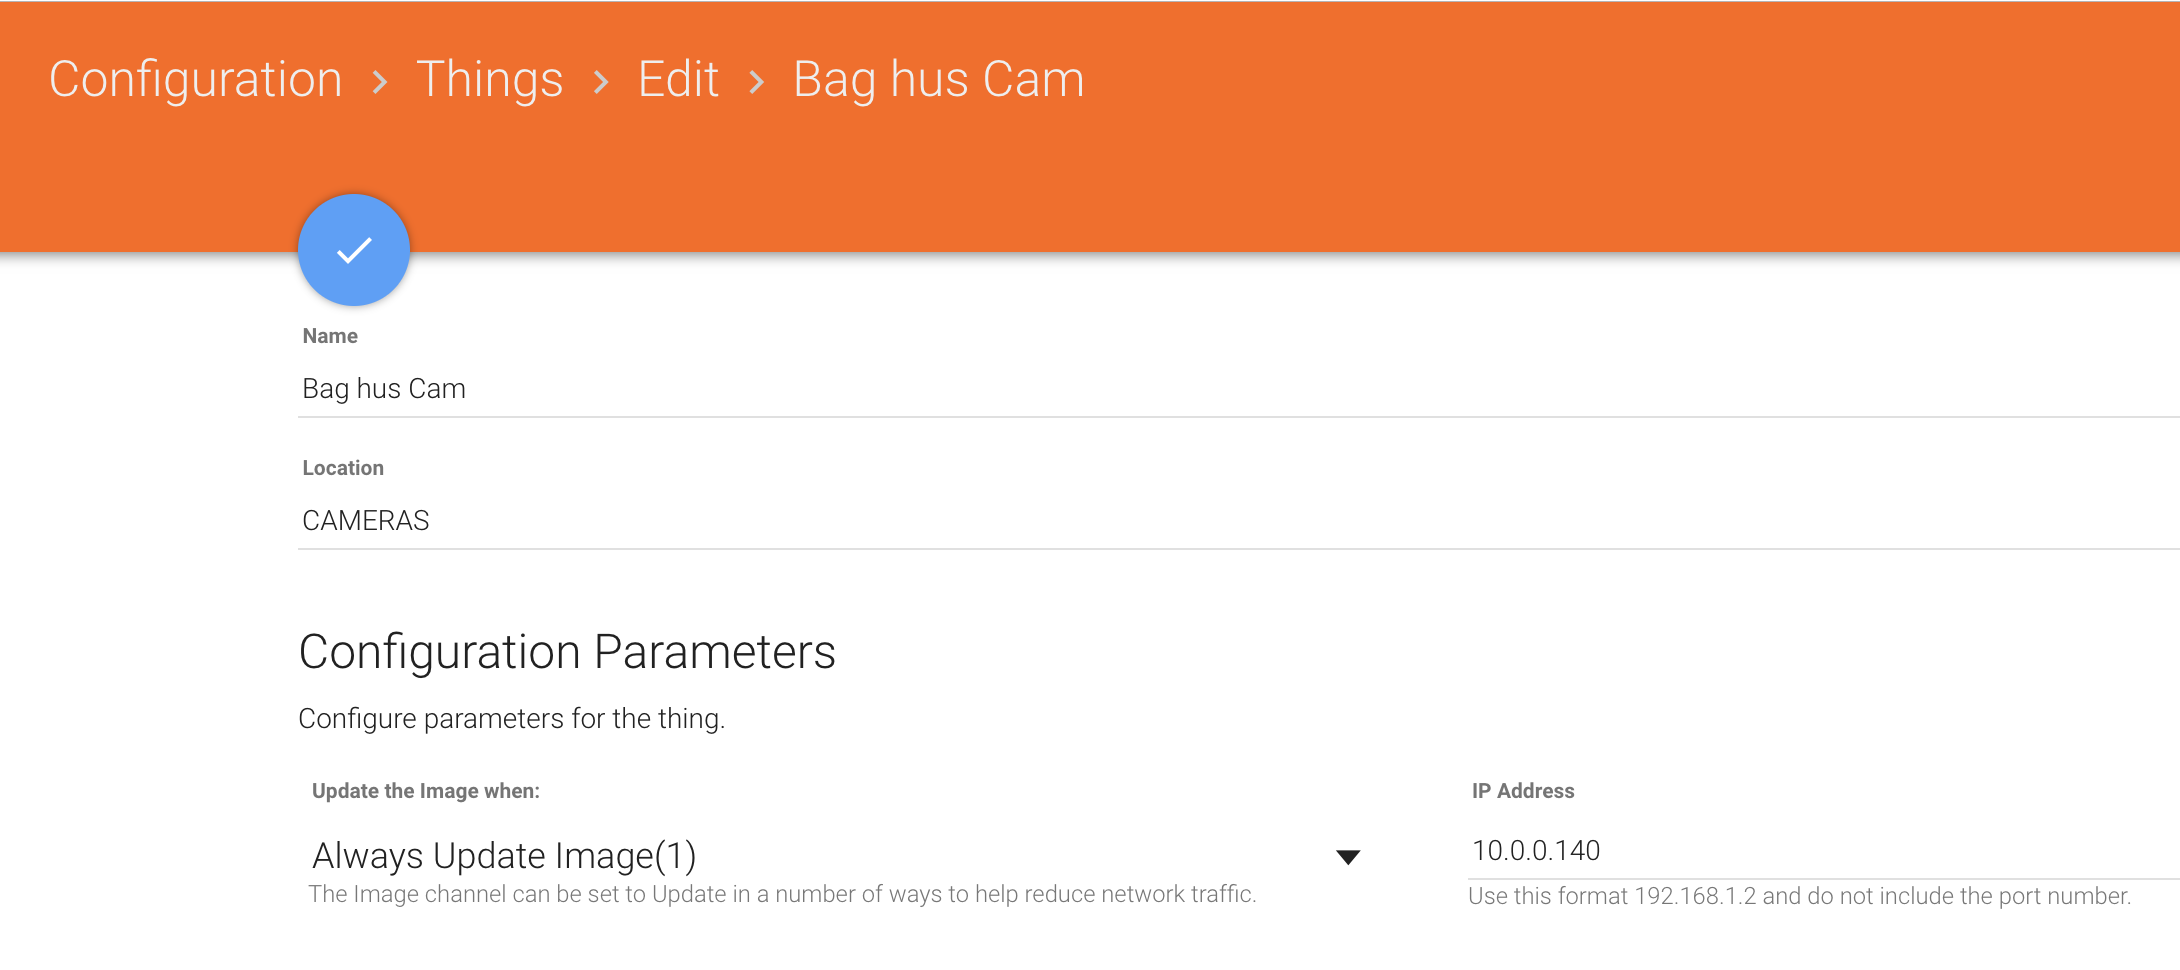
Things on Tabs
For each Thing, there is a Location field, that represents (at least) a Tab in the Paper UI:
 .
. 
Camera Binding
I use https://github.com/Skinah/IpCamera for my HIKVisions, but only with images currently. It works okay.
MQTT Server
Install the MQTT Service - this in an Internal MQTT Broker (Server)

Configure the broker.
MQTT Bindings and Channels
Install the MQTT Binding
Then Create Things and Channels:
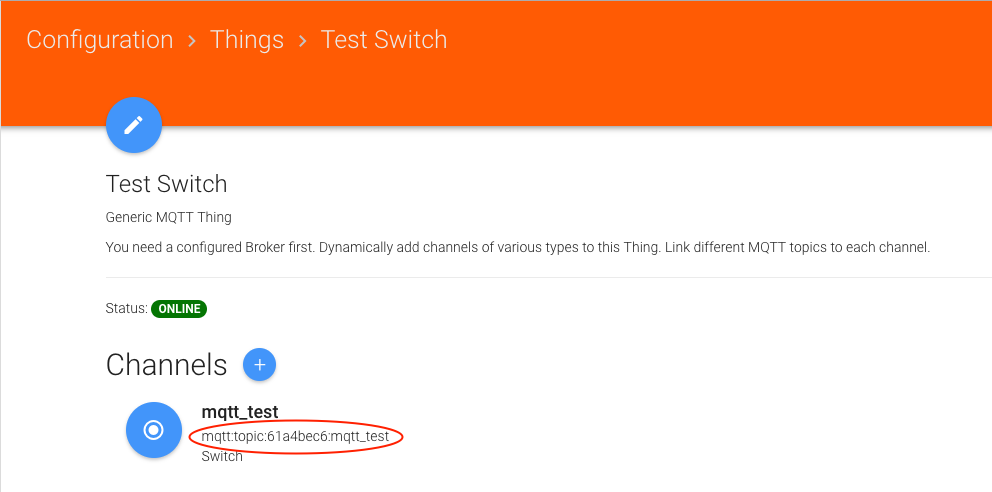
The Thing is the "physical" device, like a light Switch, and the Channel(s) is the properties the Light switch has - now, a switch has only On/Off, but other Things may have several properties, an engine can have On/Off, Temperature, Rounds Per Minute etc.
Pressing "+" for adding a channel gives the options.
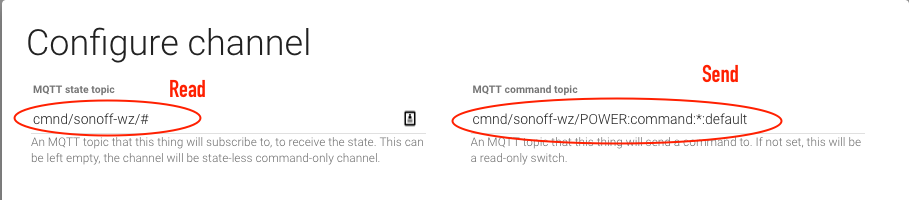
Define the Channel - typically where to send the command, and where to read the state:
| Tip |
|---|
Notice The Homie convention, when deciding MQTT Topics |
For HABPanel, the Channel can be used instantly, for a Sitemap in the Basic UI, You need to link the Channel to an Item in an items file (Notice the Channel name from the screenshot above):
| Kodeblok | ||
|---|---|---|
| ||
Switch mqtt_test "Test switch" {channel="mqtt:topic:61a4bec6:mqtt_test"} |
Now we have an item that can be used on a Sitemap
MQTT Demo Video
This shows the above configuration in action - the Basic UI in upper left, the HABPanel in lower left, an external MQTT Client in upper right and the logging in the Event logfile in lower right.
Notice that the Sitemap does not alway update instantly, no clue why currently.
| Widget-forbinder | ||
|---|---|---|
|
Links
| Inkludér side | ||||
|---|---|---|---|---|
|